Showing posts with label copper earrings. Show all posts
Sunday, September 16, 2018
ACRYLIC ENAMEL COPPER FLOWER EARRINGS!!
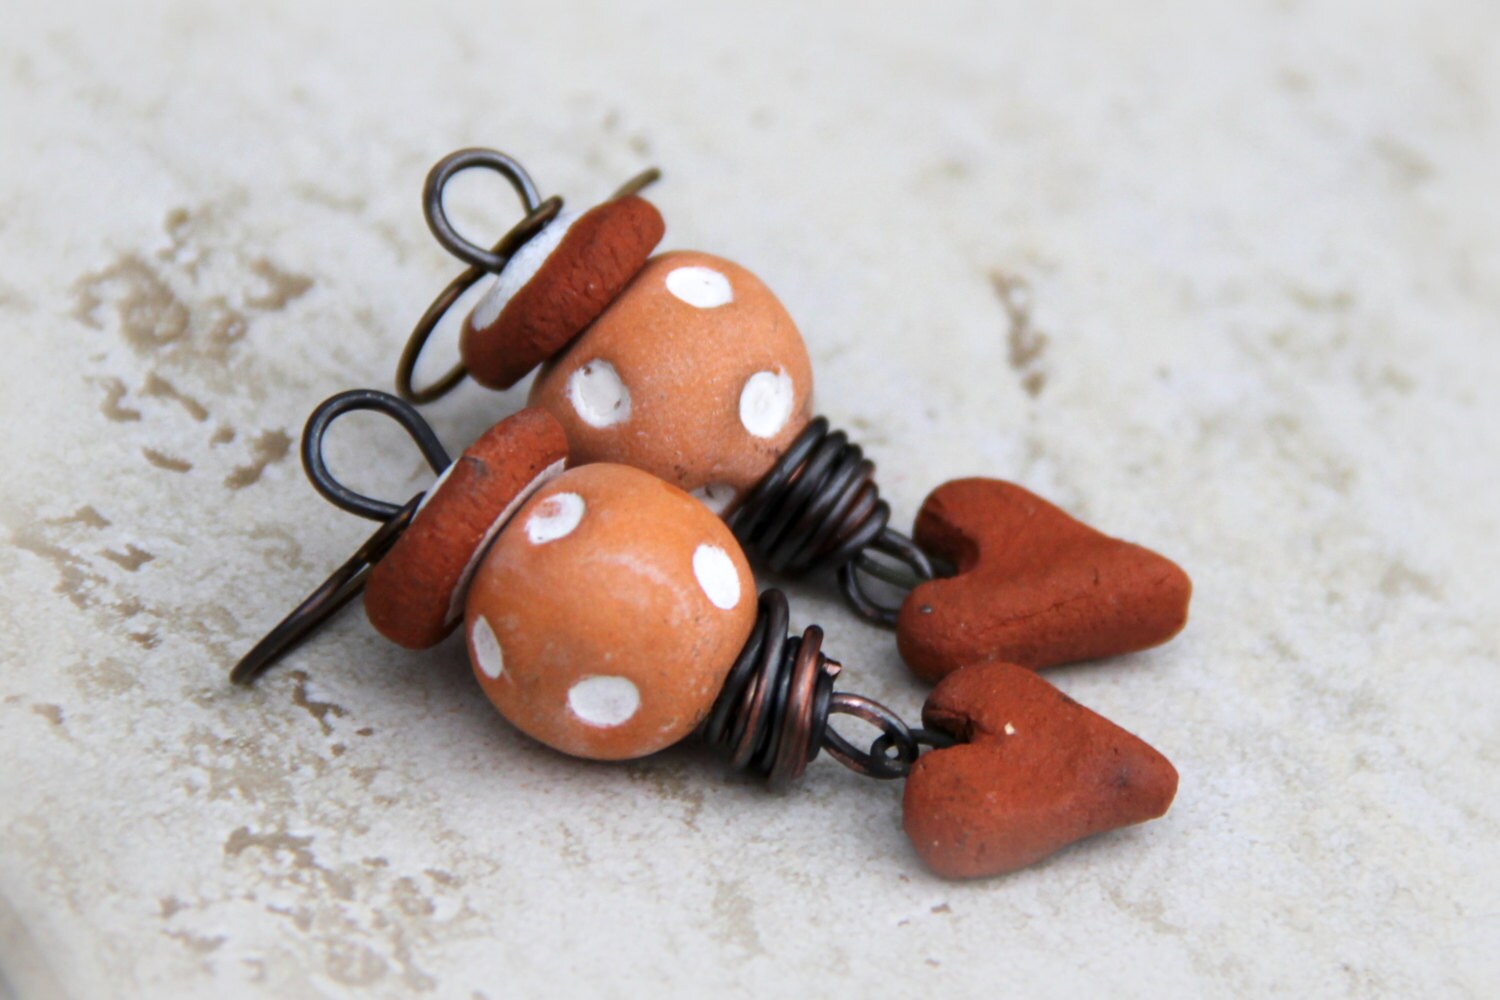
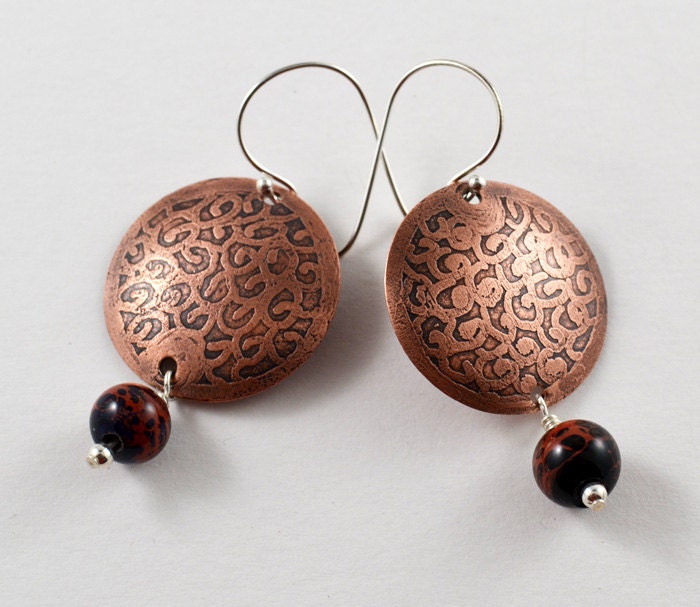
Looking through the many classes and videos I've purchased, I saw one on Craftsy I wanted to try ... "Torch-Fired Enameling: Luscious Color & Design" by Barbara Lewis. I ordered the acrylic enamels in a set of 9 and the decals used in the video. I loved the flower Barbara made ... but I think she used an enlarged version of the decal for the video. I'll ask her if I can order a larger set.
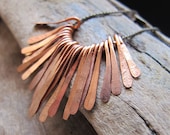
The first thing I did was copy the sheet of decals and then cut and glued the flowers onto my copper sheet. In the video she used double-sided tape and adhered the decal directly to the copper to saw out the form. Here's a photo of part of the sheet of decals and my cut copper pieces.
Then I torch fired several coats of white enamel to each copper flower. The next step was to add each flower decal to water until it started to slide off the sheet and then try get it safely onto the copper flower. It got easier. I found if the decal folded, I could slip it back into the water and miraculously it opened up ... so I could try again. Each finished piece was then blotted with paper towels and left to dry.
Later that day I fired on the decals with my torch until I thought they were done. For some reason I didn't take a photo, but I liked the effect with the sepia tone on the white background. Then I painted each flower with the acrylic enamels, trying to follow her example. Ha. They were left to dry overnight.
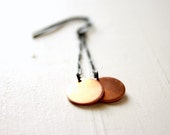
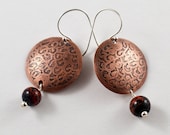
This morning, I torch fired each piece and they aren't bad! They don't look like Barbara's, but I like them. The last step was to add a transparent enamel which gave the pieces a glossy coat. They did improve, but they don't show the lines of the decals. So my enamel was too heavy (not "painterly") or I overfired. Next time. I lost one copper piece back when I fired on the white enamel, so I have three pairs of earrings. What do you think?
Saturday, July 21, 2018
NEW EARRINGS!
It's been a long, long, long time since my last post. No excuses, just a creative slump. I'm sure it happens to everyone. Anyway, since our Southern California weather has been SOOO HOT lately, I've been staying inside and keeping cool. And I've made several pairs of earrings. Here are the three I had time to photograph today and add to my Etsy shop. I love the textures that were achieved using the rolling mill and the richness of the patina. The ear wires are antique copper niobium, which is an alloy that is non-allergic. More to show you in a day or two. I forgot how long it took to photograph, edit and post to Etsy!
Thursday, July 23, 2015
NEW EARRINGS WITH ROLLING MILL TEXTURES
I just finished a few pairs of copper earrings that were textured using the rolling mill. The process is so much fun. It was back in May that I posted photos of rolled pieces using my new brass texture plates ... and I had ordered a package of skeleton leaves from an Etsy supplier. Here is the pair of earrings using the skeleton leaf texture. Can you picture them using sterling silver? WOW. I'm going to treat myself and order some sterling silver sheet, as apparently the price is its lowest in five years.
Here are the others rolled with a floral pattern.
Monday, March 30, 2015
HYDRAULIC PRESS PROJECT UPDATE ..... CUFFS AND EARRINGS
Wow ... after much agony, I have something to show. Did you ever have a day where nothing goes right? Yesterday was such a day. It started with my cuffs. As you saw in my previous post, I had cut out two bracelet pieces with my feather pancake die and now wanted to solder a wire going down the center of each. I wanted it to have a bit of a curve ... not be straight like my first cuff that had a folded line down the center.
I cut a piece of 12 gauge sterling silver wire and 12 gauge copper wire, curved them a bit to fit the cut feather pieces. I started soldering the sterling silver wire to the copper. Everything seemed to be going along all right, when to my dismay and horror, a piece of the silver wire broke off .... obviously it had melted through. I couldn't believe it. Well, actually I could since I was so out of practice, having not soldered for months and months. I pickled and cleaned the piece, filed the ends of the wire, and attempted to solder them together. The patch didn't look too bad until later .... when I started curving the piece on the bracelet mandrel and the wires separated again! Time to put that piece aside and look at the other one.
The other one is another story! The day didn't get better. Look at the photo below. The piece on the left. I soldered the copper wire without a problem .... until I took it out of the cooling water and saw the wire was WAY OFF CENTER. WTF?!!!! Nothing I could do at that point. I decided to punch some holes down the middle. Maybe no one would notice my mistake? HA. Actually it didn't turn out too badly.
I decided to do the same for the other piece with the silver wire. I used a heavy duty punch and punched a hole right where the wire had separated. Perfect! Then continued to punch a few more holes. Here's a photo of that piece ... it looks pretty good!
And the cuff with the copper wire and added holes ...
If you remember my earrings done with the pancake die, they were rather lifeless. I reshaped them a bit, domed them slightly and added a wire-wrapped bail ... and now they look much better!
The next step is to patina all the pieces and give them a polish. More to come ....
Sunday, July 20, 2014
Fold-Formed Copper Leaf Earrings
"Foldforming" by Charles Lewton-Brain. This book is full of exciting forms and ideas by the man who discovered the concept. The earrings I listed in my Etsy shop are very simple ones done by foldforming. They were cut from copper sheet, folded, shaped and textured. They were then annealed to soften the metal so the fold could be opened. The beautiful patina is a result of the annealing process. The earrings were completed with my own lampwork beads and handmade sterling silver ear wires.
Monday, November 25, 2013
"Neutrals can be Colorful too!" Treasury
My etched copper earrings were included in this Etsy treasury today!
Yes, they can!
'Neutrals can be Colorful Too!' by marolladnj
Yes, they can!
Sponsored by send bulk email from excel.
Sunday, May 19, 2013
"Copper This" Treasury
Wow, this treasury is really beautiful. My etched copper earrings with lampwork beads are included.
'Copper This' by Splodgepodge
Generated using Treasury HTML code generator by Whale Shark Websites.
Subscribe to:
Posts (Atom)


