I recently ordered a bangle bracelet die from
http://www.wubbersushop.com and it came with two options, a small wave pattern and a large wave pattern. I didn't know what to expect, but had seen their video and hoped I could make their wonderful bangles. Guess what .... I did!
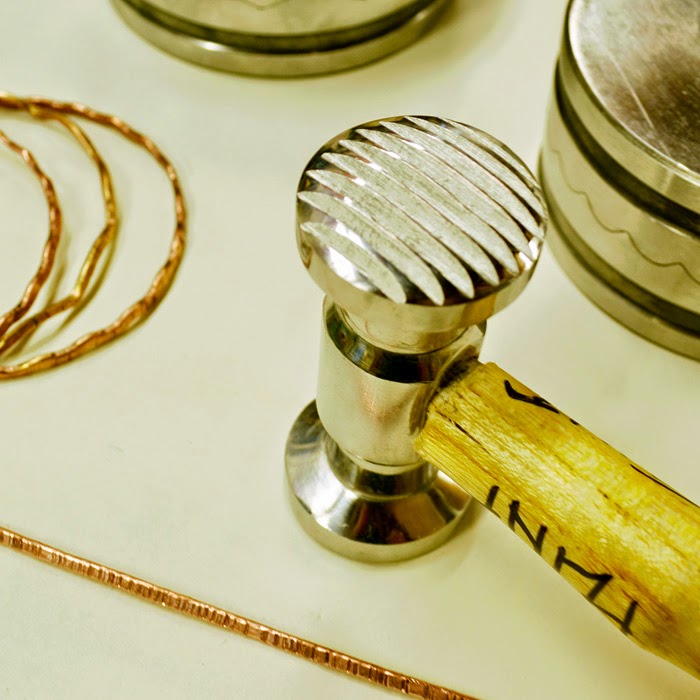
I had a roll of 12 gauge copper wire and cut three 7-1/2" pieces. I smashed one flat on both sides and used a texture hammer to finish it. The texturing added 1/2" to the wire.
Here's my favorite texture hammer:
After flattening and texturing all three pieces, the wires were annealed and formed so that the ends met perfectly for soldering. I used my copper solder for the first time and it worked well. The pieces were then shaped into rounds using a bracelet mandrel and a rawhide hammer.
Then came the exciting part ... using the bangle dies. The dies came with a special weighted hammer. Each shaped wire was centered inside one of the dies, the top was added. Then the hammer blows formed the bangles.
Here are the dies ... first the small wave pattern, then the large wave pattern.
And finally, the three bangles which came out perfectly!
The three look so good worn together. I want to try brass wire next ... and eventually sterling silver!