
Showing posts with label engraving glass. Show all posts
Showing posts with label engraving glass. Show all posts
Sunday, October 5, 2014
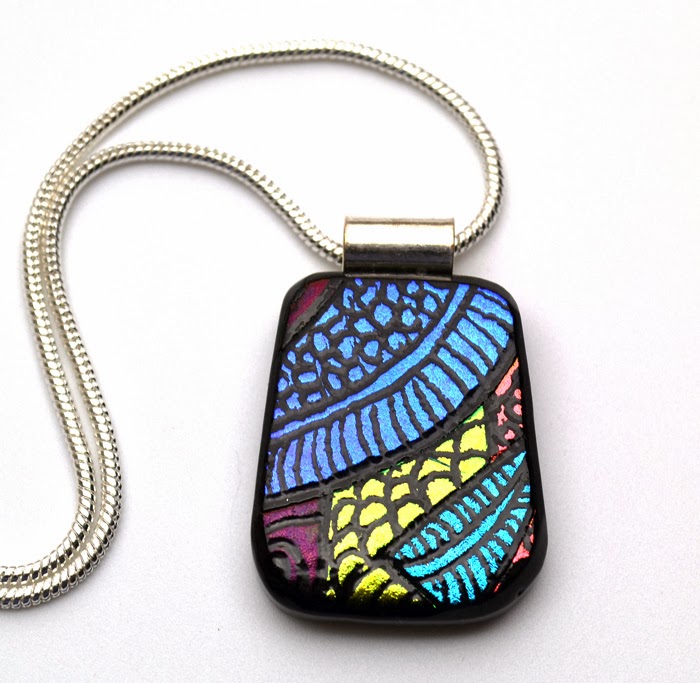
More Engraved Dichroic Pendants
Remember the dichroic pendants I posted last year with the engraved zentangle patterns? Here are a few more that just fired yesterday. These were done by using rubber stamps on the glass and then engraving the design with a diamond tip ball engraver. The engraving goes through the dichroic coating so that the black glass underneath shows. The next step in finishing these pendants is gluing on the bails.

Monday, October 28, 2013
PICASSO Pendants
I wanted to show you a few of the Picasso pendants I recently listed in my Etsy shop. These are from the original firing. My second piece sits waiting to be cut up into pendants ... but I've been so busy working with clay. My first bisque firing of white clay pieces is done, and I just unloaded it to make room for red clay pieces. HELP! Anyway ... here are the pendants.


These last two pendants were fused a second time as an experiment, and I really like the effect!


These last two pendants were fused a second time as an experiment, and I really like the effect!
Monday, October 21, 2013
Another Picasso Piece -- Wild and Crazy!!
I've been working with clay the past two weeks. So much fun, just hand building and rolling different textures on the clay. Why didn't I take photos? .... Those pieces are in the kiln now bisque firing. It's my kiln load full of white clay pieces. This morning I cleaned everything, put all my tools away, vacuumed .... so tomorrow I can start with red clay. The same tools, but different clay boards, different slab roller canvases ... everything already stained from red clay.
So yesterday after the kiln was loaded, I put together another wild and crazy Picasso glass piece. This one is really bright ... maybe too much color? I got out my Dremel and ball engraving tips today and started drawing on my glass piece. In about five minutes, the Dremel made a strange sound and completely stopped working. I got out my portable Dremel and of course the battery died after a few minutes. One more Dremel to try. It's one with the long flex shaft that would be ideal for engraving, but how to get the grinding wheel off and the engraving tip on? I finally remembered the little hole you had to insert something into, and also that you needed the special wrench from the Dremel box to loosen the fitting. Like magic, I was able to get it ready to engrave.
So the following two photos tell the story .... before and after. Yes, it has gotten wilder and crazier!!! More to come....


Wednesday, September 25, 2013
Fired Picasso Pieces - Next Step
The pieces fired perfectly. Remember, the firing was done with the dichroic glass facing down on the shelf (on kiln paper). They look really good. I noticed an error I made, OK maybe two. Can you spot them? I used two pieces of clear glass by mistake -- I should have remembered you do not "cap" these pieces, and putting a piece of clear on top is the same thing. The pieces will be engraved with a ball tip, so if you carve into clear and refire it, you will lose the carving. Anyway, I learned something by my mistakes.
I took a photo as the pieces were removed from the kiln this morning, and then later today I got the nerve to get my little portable Dremel, my set of round diamond bits, a spray bottle with water, and my pieces on top of a towel. It's important to keep water on your glass pieces while you engrave. Also you lightly draw the bit over the glass, as if you were writing with a marker. Don't dig in. I found it easier than I expected it to be.
Here are the fired pieces:

And the same pieces engraved:

I simply outlined each glass piece by engraving around it, and the colors seem to pop. The next step is to engrave patterns. If you look at the website zentangle.com or their blog http://zentangle.blogspot.com, you will be amazed at the patterns! Endless. I've never been much of a doodler, but there's a beginning to everything. There's more to come soon ....
Subscribe to:
Posts (Atom)