Friday, December 30, 2011

Torch Enameling Week!

It's been a fun (sometimes frustrating) week! A friend bought several vials of enamels a few weeks back and now she was ready to experience torch firing. She wanted me to show her how to do it. My background with enameling has been VERY limited, but since I knew something, I was willing to share. Years ago I took a class with Suzanne Kustner, a great teacher and artist, at Creative Arts in Sierra Madre, CA. We used the enameling kiln in that class. Then not too long ago I had a jewelry class that included a wild torch firing session with Richard Salley. He had his own way of firing enamels, following his own rules, and it worked!

The first step in our week was to cut out copper pieces to use, limiting the size to an inch or so. This included filing, drilling holes, doming, cleaning -- that took care of the first day! But then it was time to start. I demonstrated how to apply the Klyr Fire, sprinkle on the first coat of enamel, then torch fire it. Here's a photo of my friend's pieces (she started off firing two pieces at a time!) with the funky set-up using a steel binding wire holder we made in Richard Salley's class. It works.


So after I demo'ed my first piece and it had been taken out of the pickle pot, I was explaining the process of always filing the edge of the piece clean before the next firing. I was standing there, filing, when I dropped my piece on the cement floor and, guess what, a piece of the enamel chipped off. ##@*!! I couldn't believe it. But I calmly sat and reapplied the second coat, adding a little more to the broken area. Then minutes later after I had refired the piece, I was standing in the same exact spot filing my piece, when, guess what? YES, I dropped it again and another piece of enamel chipped off. My cocktail hour almost started early that day, but since I was the Teacher, I was not going to give up or have a temper tantrum! My day continued in the same way -- nothing worked. However, my friend had an absolutely wonderful day! Here are the pieces she made -- WOW!


I took the next day off. Am happy to say I worked several hours yesterday experimenting again. This time I had no accidents. In fact I refired THAT piece again and it's one of the two bright ones on the top right. It was originally all red. I was experimenting with browns in the other pieces and like the results.


Then I wanted to try find something that looked like turquoise.


Years ago I made two bracelets using copper pennies that were dated before 1982. These were 95% copper (the later ones are 97.5% zinc and plated with a thin copper coating). The top bracelet has domed pennies soldered to flat textured sterling silver pieces. The bottom bracelet has domed pennies soldered to flat pennies.


I learned that the 95% copper pennies can also be enameled. So .... in addition to the copper pieces that were cut at the beginning of the week, I also drilled, domed and cleaned pennies. Here are pennies with tests of different colors. The backs are not enameled. Notice the penny in the middle -- it cracked when being domed.


It sure was fun, and I think there will be more to share next week!

Saturday, December 24, 2011

Christmas Tamales!

For the past few years my daughter and I have made tamales for Christmas. Years before we ordered tamales from a local Mexican restaurant, but found out we could make better ones ourselves! In the past we've also made pasties, which are meat and vegetables pies in a crust. I grew up in a Finnish community and my mother made pasties all the time ... but this year my daughter decided we would only make tamales. That was okay with me -- I can make pasties any time.

I bought about 20 lb. of pork and started cooking it at 6:00 this morning with lots of onion, garlic, salt and water.  The day before I made a red chile sauce with dried California chiles that you add to the cooked pork. It's kind of spicy, but tastes JUST RIGHT. If you want all the recipes, let me know!

So by the time my daughter arrived at 9:00 a.m. my pork was ready and shredded.


She brought her own shredded chicken, a sauce made with tomatillos, as well as ingredients to make vegetarian tamales for her friend: green chilies, olives, carrots, corn, cheese.

Here are corn husks soaking. I think we used three bags. That's a lot!


How many tamales did we make today! My guess is around 12 dozen! We started with a 25 lb. bag of prepared masa. My friend adds more lard and baking powder to hers, but we used the prepared masa as it was. The finished product was GOOD!!


Here are the finished tamales cooling.


PERFECTION!

Wednesday, December 21, 2011

What happened to Monday, Tuesday and Wednesday?

I called my 12 year old grandson Austin last week and asked when we could go Christmas shopping. He said his school vacation started Monday this week, and could he come over Monday and spend the night. I picked him up at 9:00 a.m. Monday, and his visit turned out to be three days and two nights! It really was great and lots of fun. He's such a soft-spoken, polite and smart young boy, it's a pleasure to have him spend time with me. And to WANT to spend time with me! He plans to come again next week.

BUT, I lost my iPad and iMac for three days! It's like when your power goes out and you can't use any of your appliances. Of course I had my iPhone, but the strain on my eyes has given me a headache. I'll feel better in the morning.

We went to the local Game Stop and Target and he selected three video games for his Christmas present. I found two books for myself (that I'll look at when my headache goes away!)

But the most fun day was yesterday when he used the torch to make his first glass beads. I know it was frustrating for him. And equally as frustrating for me. When you make glass beads, you have to wear didymium glasses (it eliminates the glare of the flame and you see perfectly). I had one pair which I insisted he wear. I had another pair of glasses that you use to look into the peephole of the gas kiln. They were worthless when making beads. I could only see the bright orange flame and not the glass flowing on the mandrel. So when I was demonstrating, I could not see what I was doing! HA. Poor kid. But after several beads, he was catching on and I think one comment was "I got it!"

So today he cleaned the bead release from the inside of the beads with a round file. When we discovered there were not enough beads to make a 7" to 7-1/2" bracelet for his mother, I found some glass beads he could use as fillers. It turned out well, and he has a special gift for mom. Here's a not-so-great photo I took with the wrong camera. The glass is nile green. So picture a deeper green that looks like jade!


My friend Donna turned out to be my best Etsy customer over the weekend, asking me to make two pairs of etched copper earrings with my lampwork beads for her friends, and also buying four hand built bowls (duplicates of the ones purchased by Fine Cooking Magazine a while back -- have not seen any evidence of my pieces or any other hand made pieces in their past two issues). The earring photo was taken with the iPhone and not my best effort. But telling Donna the earrings were ready for pick-up!


Donna saw one of my slumped wine bottles, a very short one that I use for a spoon rest. She asked me if I would slump a special bottle for her from a wedding she just attended. She wanted to etch a message on the piece and give it to the couple for a Christmas gift. Here's a photo of three bottles I did for her, the special one being the brown bottle in the middle. It'll be interesting to see what she does.


Friday, December 16, 2011

The Pioneer Woman's Christmas Shows

One of the blogs I have followed for a long time is ThePioneerWoman.com. There is a photography section there that inspired me and I think it was partly the reason I felt I could photograph my work and open my Etsy shops. Plus my new camera, lens, light box and software helped too!

Ree is also a great cook, believes in lots of butter. Right now she is giving away unbelievable daily prizes until Christmas. Check out her website. If you don't enter, you can't win, right?

She just listed her Christmas Show schedule on Food Network. The first episode is tomorrow, Saturday the 17th, followed by Sunday, Monday and then Thursday the 22nd.

Saturday, December 17, 12pm/11c
Sunday, December 18, 8am/7c
Monday, December 19, 6pm/5c
Thursday, December 22, 12pm/11c

Thursday, December 15, 2011

COMFORT FOOD - Potato, Cheddar and Ham Casserole

It was a cool rainy afternoon and I needed to cook. That beautiful turquoise blue stained glass box sold this afternoon and I was feeling kind of sad because it was so beautiful and I had to say GOODBYE.  BUT I have enough glass to make one more.  To keep or sell?

I cooked a ham during the week and tonight made real comfort food. And finished that 10# for .99 bag of potatoes from Thanksgiving! I used a bigger dish than I usually do, as this weekend will be busy here, and I'd rather visit than cook when I have company.

It's just a matter of layering potatoes, onions, ham, grated cheese and the soup mix until you fill the baking dish. I added a few spoonfuls of sour cream this time as I didn't want to use all the dogs' milk (yes, they beg for milk after every meal). Chopped green or red pepper also adds a great flavor. The original recipe called for making a white sauce, but why work so hard when you can use cream of chicken soup and a can full of milk. The recipe also called for precooking the potatoes - place the potatoes in saucepan, cover with water. Bring to a boil and immediately remove from heat and drain. That is your option. I bake mine until the potatoes are done, covering with foil toward the end.

Potato, Cheddar and Ham Casserole
6 potatoes, peeled and sliced
2 cups cubed, cooked ham
1 onion, sliced thin
1-1/2 cups grated cheddar cheese
1 can cream of chicken soup
1 soup can full of milk
1 tsp. basil
Salt and pepper
Chopped green or red pepper (optional)

Combine the soup, milk, basil, salt and pepper. Spray your baking dish with Pam and layer half of the potatoes, ham, onion, cheese, soup mix. Repeat, ending with the remaining cheese. I know you will want to grate more! Even add Parmesan!

Bake at 350 deg. for 1-1/2 hours or until the potatoes are soft. Enjoy.
Note: Baking in a covered casserole will cook faster. Uncover at the end to brown.

Here are the Before and After photos. I don't photograph food as well as Pioneer Woman, but you get the idea!


Ice Chips Treasury

This is a beautiful Etsy treasury that includes my fused glass plate made with reeded glass.
http://www.etsy.com/treasury/NTQxNjM1MnwxNTM2ODQ4OTMy/ice-chips

PLEASE DON'T EAT MY ORANGES!

Every year I go through this. When my navel oranges start to ripen, the squirrels and rats have a feast. There's nothing I can do. My dogs try to help by barking and jumping around the tree, but that does nothing. I have a baseball bat that I use to hit around the inside of the tree. That occasionally does scare a critter and it jumps down, runs across the yard and over the fence! But do I have to do that every night in the dark? I even use a "friendly" Havahart cage that triggers the door to close if something goes inside -- then I drive to the park to set it free. But most of the critters are too smart to go inside for a piece of apple with peanut butter -- when they could have one of Rose Mary's navel oranges!

I do have an abundance of oranges every year, but I DO NOT like sharing with the critters.


Wednesday, December 14, 2011

25 Ways to Wear A Scarf in 4.5 Minutes

If you have not seen this, it will be a treat! I've never been a scarf wearer, but now have a couple to experiment with. Watch this YouTube video:
http://youtu.be/5LYAEz777AU

Then most timely and unbelievably on Sunday my friend Donna came to visit bringing me a present and a project to share! She gave me a beautiful silk SCARF and was going to show me a felting technique she had learned at a recent art show.

What a scary process! I watched her work on her scarf, poking holes in the silk with this gizmo that had lots of sharp needles. She did this over a felting pad that looked like a big brush upside down.  I loved the effect the sharp needles made in the silk and decided I would do a strip of this across both ends of the scarf. That would have been enough for me, but Donna had an assortment of beautiful silk blend threads to add.

Here's what I did to the ends of my scarf. I can't wait to iron it and wear it!


Tuesday, December 13, 2011

Wow, it's been busy!

The ceramic sale was a complete success and I'm looking forward to receiving that little "mad money" check!  It's always fun to see everyone at the sale, the artists and the repeat customers.

My two Etsy shops are keeping me busy too! Last week I had a record of five orders. This week I've had three orders, and it's only Tuesday! I haven't found the perfect time to go to the post office, but last Saturday there was only one person in line! But by the time I left, there were ten.
I made three stained glass boxes since the last two sold last Wednesday. I found this beautiful turquoise blue glass in the glass I inherited from my friend Peggy when she sold her gallery in Montrose and moved to Washington. Isn't it gorgeous? The streaks of color and the tiny bubbles that look like water droplets. I have enough to make another box, but first I'll see what else I have.


Another lunch today. This time with the golf group I belong to at Brookside. We play on one of the courses next to the Rose Bowl in Pasadena. I'm sure you have watched the Rose Bowl football game played each year and have seen the beautiful foothills surrounding the area. That's where I live, about 10 minutes away. Last week we had HEAVY winds and my power was out all day Thursday and through Friday morning. Yesterday we had a really heavy rainstorm and saw snow in the foothills above me. Today there are blue skies and it is going to be a gorgeous day. 

Friday, December 9, 2011

New Items Added to RoseMarysGlassArt

All my glass boxes have sold. I thought I was safe for a while since I had two left, but Colleen from PA bought both of them Wednesday! I made one yesterday with beautiful, sparkling iridescent glass and posted it in my shop. Hopefully a beveled box will get done by tomorrow. The ceramics sale starts today, so I have cashiering and packing jobs there, and it is always so much fun to look at everyone's work.

Here's a photo of my newest glass box. Also photos below of the two 5" square Fossil Vitra plates I added to my glass shop this morning.


Thursday, December 8, 2011

"Fossil Vitra" Results

It's been busy here preparing for a ceramics sale this weekend at our local community center. If you are anywhere nearby, it's the Community Center of La Canada Flintridge, 4469 Chevy Chase Drive, La Canada Flintridge, CA.  The hours are Friday 3-9 pm, Saturday 11-5, Sunday 10-4. Rooms and rooms of just ceramics!

I want to share results of the Fossil Vitra firing. I showed you photos after the enamels were sifted onto leaves and the glass was placed over the leaves in the kiln. The firings went well and I took two quick photos below. The iridescent glass is beautiful!


Saturday, December 3, 2011

More High Winds!

Today I'm firing the "fossil vitra" fused glass plates I made a few days ago. This is the final firing and will shape the flat glass into plates. I ordered larger molds which arrived yesterday. They were coated with mold release, dried overnight. I'm keeping my fingers crossed that the power stays on during these HIGH winds and the firing is successful. We'll see tomorrow.

Friday, December 2, 2011

Clean Out the Leftovers!

Any more leftovers? Throw them out! I cooked my turkey dinner for friends a few days after Thanksgiving, and yesterday was going to be my "clean out the refrigerator" day. I was also going to make my Sour Cream Enchilada recipe with turkey, rather than chicken.

It started out to be a normal day. Then at 9:00 a.m. I got a call from Sarah's vet in Pasadena (Sarah is my Poodle/Bichon who goes to an animal dermatologist for her pink sensitive skin allergies) saying not to come in for her appointment because Pasadena was in a state of emergency. What? Apparently even schools were closed. We were having high winds that started during the night. THEN, almost immediately, the power went out at my house. No!

Let's just say yesterday was an interesting day. Do you know how many times you open the refrigerator or freezer in a normal day? How many times you use the microwave? The toaster? Watch TV? Use the computer? After calling the electric company and reporting the problem, the recording said they had no idea when the problem would be fixed. Later in the day the recording said some customers would have service by evening; then later, some would have service Friday morning. Around 4:00 p.m. I started getting out the candles and placing them all around. The fireplace had been blazing all day because it was cold, in the 60's (which is probably still warm to those in the East -- sorry).

My daughter came over after work to get some wax for glazing her pottery. She thought we were in distress, but we really were not. I had been playing Crazy Birds on my iPad and enjoying a cocktail. Sarah was playing ball with me in the living room with one candle and light from the fireplace! It was dark and it sometimes took her longer to find the ball. Ha. But it was peaceful and fun. We went to bed early, watched Netflix on the iPhone, and I think the power came on around 4:00 a.m.

Today was a normal day. I got the refrigerator cleaned out, Sarah had her appointment at the vets, and I made the luscious Sour Cream Enchiladas. I want to share the recipe with you because they are soooo good. See photos below!

SOUR CREAM ENCHILADAS
1 can cream of chicken soup (the original recipe was for 2 cans)
1 cup sour cream (I used light)
1 4 oz. can diced green chilies
Green onions, chopped (as much as you like - I use very little)
Grated cheese (I used the Mexican Blend from Trader Joes)
Cooked and diced chicken/turkey
1 package corn tortillas (I used Trader Joe's whole wheat)

Combine soup, sour cream, chilies and green onions. Soften tortillas in microwave 20-30 seconds in paper towels to soften. Spread a heaping spoon full of the soup mixture over the tortilla, add a handful of turkey, a handful of grated cheese. Roll and place seam side down in a baking dish that has been sprayed with Pam. Continue filling the tortillas. Spread with remaining soup mixture and top with more grated cheese. Bake 350 deg. until bubbly 40 minutes. Note: These are very mild, so if you want them hotter, use a hotter cheese and fresh chilies. Or add some hot salsa to the finished product! You know how you like it.

Here are photos of my enchiladas before and after baked. ENJOY!


Tuesday, November 29, 2011

Results from Adjustable Molds

Remember the wooden adjustable molds I showed you? I finished a few pieces I made with them, and here is one I photographed this morning and posted in my Etsy shop. All the pieces turned out so well. The photos don't capture the creamy smoothness of the glaze.


Monday, November 28, 2011

Sunday, November 27, 2011

"Fossil Vitra" Fused Glass

Today I'm firing my gas kiln outside to cone 10. It's going to be a LONG day. The firing takes anywhere from 10 to 13 hours, depending on when cone 10 at the bottom of the kiln bends over. The kiln needs constant monitoring, recording temperature, increasing the gas flow, adjusting the damper. Plus I need to monitor MY anxiety and worry as to the outcome of the firing. The way I do that is to work on another project and try to forget what's happening to the 40-50 pieces in the kiln!

Today I am working on fused glass pieces from a project called "Fossil Vitra Tutorial" which was published on the FusedGlass.org website. Here is the link:
http://fusedglass.org/learn/project_tutorials/fossil_vitra

I have applied glass powder directly on leaves and these leaves are fired under glass. The leaves burn away and the glass powder is fused to the sheet of glass. It is all explained very simply in the tutorial. I've done it before and the results were excellent. I was asked to make a couple 6" x 8" plates similar to one in my Etsy shop, so today was the perfect day to do it. I also made two 5" x 5" plates, all shown in the photos below.

Here is the leaf on a paper towel with a 6" x 8" drawn pattern.

I've sprayed the leaf with hair spray, added brown glass powder to the
stems and started applying green powder to the leaves.

Here's what it looks like. I added a second green powder and the yellow for highlights. After it dries, I carefully lift it onto a piece of fiber paper and place it on the kiln shelf.

I carefully place my glass (two layers) over the leaf while holding my breath. 
I don't want any of the glass powder to come off.

Here are the four pieces ready to be fired. 
I'll show you the results in a couple of days!


Friday, November 25, 2011

More Copper Etching

I spent Thanksgiving Day at my daughter's house. Remember that's where I took the French Apple Pie for my son-in-law. (By the way, he said he liked it -- it was served to him with two scoops of vanilla ice cream, so maybe it tasted better than mine!)

My daughter was doing a bisque firing in her electric kiln. She will eventually use the low fire glazes she has on hand to do her first glaze firing in a week or so. I (we) can't wait to see the results. She perfected a ceramic taco holder that holds two or three shells (I can't remember which) upright so you can fill the shells, heat them and serve the tacos in the holder. They are made with white clay and she will use transparent glaze on them. Maybe I'll add a taco holder to my wish list?!

We like to share projects with each other when we have time, so I took my etching supplies and cut squares and rounds of copper to show her how to etch copper. This was the D battery and salt water etching method that I posted a while back. It was definitely a success! I will show you her finished earrings when she comes over and I can take photos. My son-in-law was impressed with our "science project" -- the salt water was bubbling and it turned orange after 15 minutes or so.

I finished another pair of earrings today using the same method. So much fun!

Monday, November 21, 2011

Rustic Yuletide Treasury; French Apple Pie?

I don't post all the Etsy treasuries that include my pieces, only the ones that have items that I really like.  I liked this treasury:
http://www.etsy.com/treasury/MTQxOTgxOTh8MTE2NTg1MDE2MA/rustic-yuletide

Have a happy and safe Thanksgiving Day and weekend. I can't wait for the turkey and dressing! Then the French Apple Pie that my son-in-law requested I make. Little did he know I have never made one before! I have three recipes from various cooking sites and I'll just wing it. It'll be good .... it'll be good ....

My friend and I are cooking and will have a pre-Thanksgiving dinner on Wednesday. Then later in the weekend I'll cook my own turkey and wonderful stuffing for another group. Next week sounds like time for soup and saltines.

Tuesday, November 15, 2011

Adjustable Wood Slump Molds

I ordered three adjustable slump molds from www.bambootools.com recently and was so excited to see the quality and ease of use! Finally on Sunday I devoted the afternoon to using them. The molds are square/rectangular; hexagon; octagon. They can be stretched to your choice -- A square or a rectangular, any size; a perfect hexagon or a long, thinner hexagon. You can see what I mean by the photos below. The size depends on the kiln shelves you are using. These pieces will go into my gas kiln which has 12" x 24" shelves and you have to allow for three posts. My electric kiln has roundish shelves 23" across, so that will be a new adventure in creating larger pieces. What fun!


Sunday, November 13, 2011

Soooo Busy!

It was a very busy week helping my women's golf club prepare for a golf tournament we hosted on Friday. The weather forecast kept us in suspense all week, 60% chance of rain, then 30% and finally 10%. Well, it sprinkled in the early morning before the players checked in so some of our preprinted score cards were smeared, and our check-in sheets were damp and hard to write on. But everyone had a good time, we had good food, lots of raffle prizes and the weather cooperated with sunshine later in the morning! Perfect cool weather for golf.

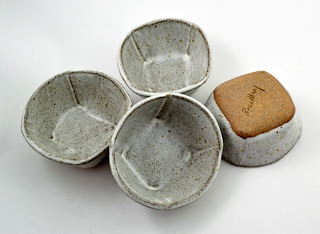
I was able to photograph and post some of the items that came out of my last glaze firing. Remember the four square handbuilt bowls that Fine Cooking Magazine bought for a photo shoot? No, I have not heard or seen anything of the bowls, but I did make a few more. They are so cute and perfect for a single serving of something wonderful.

Tuesday, November 8, 2011

Sunday, November 6, 2011

Crazy Squirrels!

The squirrels love my yard and my neighbors' yards because we have year-round fruit and vegetables. But this is crazy. They have started dropping lemons from my tree and eating the peel only! What's with that?


I have several dwarf citrus trees and noticed today that my little red grapefruit tree has gigantic fruit! These grapefruit are so sweet when they ripen. I hope the squirrels don't notice them. Fortunately my lemon tree is loaded, so the squirrels should be occupied for months.

Beautiful Bowls of Soup Treasury

It's been raining all day and I made the most wonderful chili!  I just saw this treasury on Etsy and wanted to share it. These bowls are so great -- calling for homemade soup or stew!
http://www.etsy.com/treasury/NTM4NDkxNXwxMDQyOTQzMzM1/beautiful-bowls-of-soup

Saturday, November 5, 2011

Bijoux Etsy Treasury

My Etched Copper Earrings were included in this great treasury today:
http://www.etsy.com/treasury/NTY5MDU5MXwxMDMwMDg5OTg5/bijoux

New Clay and Glass Items

I glazed and fired my clay pieces this week and unloaded the kiln yesterday. It was a great firing, and I've been sanding mug bottoms (the clay has a lot of grog), photographing, and posting pieces one by one to my Etsy shop. Here are a couple mugs I made using the new texture tools I showed you a while back.


Here's an apple baker:


I also added some fused glass holiday tree ornaments and this stained glass train. Cute!


Wednesday, November 2, 2011

The Blooming Succulents

You've probably tired of my succulents by this time. I promise this will be the last post showing THIS particular plant and its buds and blooms. You saw the buds developing into balloon-like buds a few days ago. Well, the next day there were blooms, and those blooms lasted for only one day. So lucky for you I had my camera. Sorry to have my wrinkly hand in these shots, but the other option was to get down on my back and shoot up.

Here are the blooms. And the flies. Did I forget to mention there is also a smell?


And here is another perfect bloom on the other side of the plant:


A Few New Etsy Treasuries

I love looking through the Etsy treasuries, and I hope you do too.  Not only am I posting them to show my pieces, but each treasury has 16 shops to look through. Who knows what you'll find, especially with the holidays around the corner. And the shopping is so easy. You press the "Add to Cart" button and then you pay using a credit card or PayPal.


My Rust Matt handbuilt mug is in this one:

I love all the variety of whistles!  I did an all-whistle treasury a few months ago too.

And look at all the boxes! 
http://www.etsy.com/treasury/MTcwNDA3MTZ8OTk2ODM5ODM5/little-boxes-in-the-hillside

Sunday, October 30, 2011

A new artist I love -- Jenny Hoople

Jenny Hoople creates jewelry out of river rocks and natural stones. It's amazing how many colors there are! She lives in Wisconsin and is so friendly and talented. I recently bought some of her Job's Tear Seeds and want to grow a few myself.  Check out her work:
jennyhoople.com
http://www.etsy.com/shop/JennyHoople

She recently started another site, a new website for Nature Crafts. She says if you want to promote your own nature craft or you've found something you want to share, this is for you. I submitted a few of my own pieces and she posted a couple!  Here's that address:
CraftingNature.com

Friday, October 28, 2011

RoseMarysClay on STATTEAM Blog today!

The STATTEAM on Etsy have featured RoseMarysClay on their blog today! I was approached by one of their leads, Jessi of DreamofaDream, yesterday to answer a few questions about myself.

http://statteamartistsonetsy.blogspot.com/

Thank you so much Jessi and the STATTEAM for this honor!

Watching the Succulent Blossoms

Yes, I've been watching the blossoms on the succulents I showed you a few days ago. They are ballooning in size and getting heavier. The flowers are going to be gigantic! Here is the first photo I posted, and the photo I took yesterday follows.


More to follow .......